
Wednesday, August 8, 2012
Where's Tony?
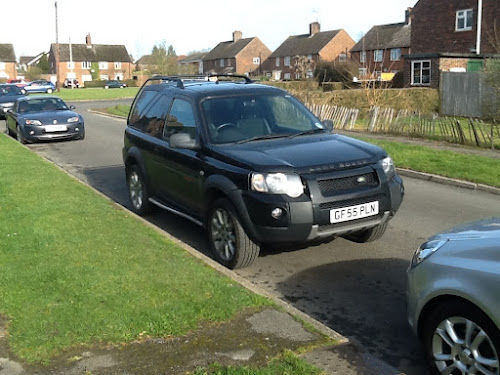
A friend of mine, (I hope I am ok in calling him a friend), Ted Meulenkamp, always travels around, and takes the odd little snippets of Roche Buildings and asks where they are, so here I go with plagiarising that idea to see how it takes off...

 Posted with Blogsy
Saturday, June 16, 2012
Apple TV and iPad AirPlay without router?

I have downloaded about a dozen films to my iPad plus a number of books, so I have enough entertainment you could say, but not for long term use, plus Lynne would like to watch the films with me, she has brought her knitting....
I know thinking to myself, I will go into Exeter and buy another Apple TV, we have a TV in the lodge with HDMI inputs, perfect idea, plus I can re-use the Apple TV when I get home for the bedroom. So off to Exeter we go to the Apple store and purchase a shiny new Apple TV.
This is when my problems started...
Of course the Apple TV has a network port and is WiFi enabled, what I did not have was a network in the Lodge where we were staying, the light worked during the day, gravity was there, we had electric, but no WiFi. Both Lynne and I were using 3G cards in our devices to connect to the Internet (GPRS only) but this was no good for connecting the Apple TV up. Then I had an epiphany, I could use Lynne's Windows7 laptop as a WiFi hotspot/router. A quick trawl of Google gave me the information on how to set it up, instructions below...
Users can activate the device and Wi-Fi hotspot through command line scripts (please run all Command Prompts with Administrative permissions) Start > Run > Cmd > (right click on Cmd.exe and choose run as adiminstrator)
a) Set the parameters for your Wi-Fi hotspot (first choose a name for your Wi-Fi hotspot and a password key)
run : netsh wlan set hostednetwork mode=allow ssid=Hotspot key=passwordhere(where ssid = your Wi-Fi hotspot name, and key = your password key) (password key needs to be at least 8 characters)
b) Start the network adapter
run : netsh wlan start hostednetwork
c) Share the connection
- Open Network and Sharing Center, right click on "Microsoft Virtual WiFi Miniport Adapter",
- Go to Properties --> Sharing,
- Select 'Allow other network users to connect through this computer's Internet connection',
- Click 'Select a private network connection' and select your active internet connection,
- Click OK and close all tabs.
d) Disabling the Wi-Fi Hotspot
run : netsh wlan stop hostednetwork
This created a WiFi network that I could connect Lynne's iPod touch to, but the iPad and the Apple TV would not connect, they could see it but would not connect, (I have a feeling that they expected to see the Internet and they couldn't).
I then manually configured the IP settings on all three devices, so that they used the same IP range, with a subnet mask of 255.255.255.0 and the laptop's IP address as the default gateway.
Low and behold, the iPad and Apple TV both connected straight away, and the iPad could AirPlay my films to the Apple TV, perfect.
So what if it is raining outside, I now have my cinema set up, armchair in front of the telly, beer by my side, pop corn the otherside, bliss...
Happy holibobs!
Tuesday, April 17, 2012
Apple TV and my Media Player

The 1st job was to connect the Apple TV to my television, which was really easy, two cables, one HDMI and a mains cable, then came the setup, again, fairly straightforward, then onto the iTunes to set up Home Sharing.
So I had a working Apple TV system, I had downloaded the 'Remote' App from the App Store and had connected my iPad 2, a quick whiz round my iPad and I sussed how the AirPlay worked, I could remote control the Apple TV from my iPad, everything was looking rosy...
LoveFilm
 My main driver for getting the Apple TV, was to use the LoveFilm streaming service from my iPad via AirPlay, I know I can use LoveFilm on my XBox, but why should I pay another £35 a year for the XBox Gold so that I can connect to LoveFilm, I have LoveFilm on my Smart Tv, but it runs Android and always falls over halfway through the film. LoveFilm has always worked on the iPad though, so my thoughts were, "why not use it via the iPad to the Apple TV", until it tried it, and guess what, the LoveFilm Player, does not allow the mirroring. This sucks!
Media Center
 I also have a Freecom Media Player, which I bought several years ago, this is a 500GB NAS box, capable of playing films, photographs and music, via HDMI, straight to my TV. Looking at the functionality between, this and the Apple TV, there is no comparison, this evening the Media Player will be consigned to the office, connected straight to my laptop, via USB, and I will start the process of converting all my digitised films to the Apple TV format using my Aimersoft Video Converter Application.
It may take me a while, to convert all my DIVX and AVI films, but at the end of the day, I will have the luxury of having all my films, music, photos, and iPad functionality in one place - my armchair in from of my TV - Nivarna!
Next Steps..
Do I REALLY want to look at the AirPlay games?Well here is a really good resource on all thing AirPlay.
Sunday, April 15, 2012
Blogsy App for the iPad
I have just downloaded the Blogsy App for the iPad. We shall have to see how easy and how good the App is to post to my various Blog sites.
 160 x 50 |  220 x 70 |
Copying pictures straight from web pages is really easy, very impressed with that, although it did change the font size...
Dragging a video direct from my YouTube pages was a cinch, how easy is this...
Dragging a photo from my Picassa account is simple too.

Wow, even uploading photos from my iPad is easy, I can see why people like this App!
Thursday, April 12, 2012
TimeLapse Video
Now I am not a photographic geek, I like taking photos and video as a remembrance of an occasion like everyone else, this is why I love this App to do Time Lapse recordings.
I read a blog at the weekend where a guy had set up his Mac to take a time lapse video of a party, then at the end of the party he just uploaded the results to YouTube so that every one could see what went on at the part - cool I thought.
After a search in the App store on the iPad, I decided to give Quick Lapse HD designed by CodeCraft Technologies a try - it is possible to install the free App, but it only gives 3 seconds of recording, so I went for the full App as the cost is peanuts.
I was very impressed on how easy it was to get up and running, I have a gorilla mount for the iPAD, courtesy of a birthday present from my son, so I just attached it to the handrail in the atrium of my office and recorded the coffee bar for 10 minutes, I was very impressed with the results.
This was recorded in the App complete with soundtrack and uploaded direct to YouTube.
On the way home last night I attached the iPAD to the rear view mirror in my car and recorded my journey home, this time I took the recording and made some minor edits using the Video Editor App and uploaded that to YouTube, still pretty good for a 1st attempt.
So far I only have one grumble about the App, and that is if a notification/alert appears, the recording stops - this can be a bit of a downer if you have set the iPAD up to record a day's event and someone send you a calendar invitation an hour into the event.
The only thing I would like to see on the App is an idiots tool for setting the recording by 'Expected Recording Time' and 'Prefered Playback Time', at the moment you have to do some mental arithmetic to figure out the Timelapse Interval by the Frames Per second.
I already have a plethora of ideas where I can use this neat little App.
I read a blog at the weekend where a guy had set up his Mac to take a time lapse video of a party, then at the end of the party he just uploaded the results to YouTube so that every one could see what went on at the part - cool I thought.
After a search in the App store on the iPad, I decided to give Quick Lapse HD designed by CodeCraft Technologies a try - it is possible to install the free App, but it only gives 3 seconds of recording, so I went for the full App as the cost is peanuts.
I was very impressed on how easy it was to get up and running, I have a gorilla mount for the iPAD, courtesy of a birthday present from my son, so I just attached it to the handrail in the atrium of my office and recorded the coffee bar for 10 minutes, I was very impressed with the results.
This was recorded in the App complete with soundtrack and uploaded direct to YouTube.
On the way home last night I attached the iPAD to the rear view mirror in my car and recorded my journey home, this time I took the recording and made some minor edits using the Video Editor App and uploaded that to YouTube, still pretty good for a 1st attempt.
So far I only have one grumble about the App, and that is if a notification/alert appears, the recording stops - this can be a bit of a downer if you have set the iPAD up to record a day's event and someone send you a calendar invitation an hour into the event.
The only thing I would like to see on the App is an idiots tool for setting the recording by 'Expected Recording Time' and 'Prefered Playback Time', at the moment you have to do some mental arithmetic to figure out the Timelapse Interval by the Frames Per second.
I already have a plethora of ideas where I can use this neat little App.
Wednesday, October 26, 2011
Mixing Sounds
I wanted to create a new welcome message for Halloween when people call my Service Desk, the question was how to do it using Cloud Computing from my Windows 7 laptop.
A quick google search brought up the kind of sound bytes I needed, this was a really easy site to pick up royalty free stuff - http://soundbible.com/
Next I needed a sound editor, I wanted something simple but with multiple channels - a quick search brought up http://www.aviary.com/ it was 'relatively' easy to use, I could import the sound bites I had downloaded from Soundbible and then record my own voice direct from my headset.
As you have multiple channels in the Aviary suite, you can adjust the different volumes and add extra effects.
I was very pleased with the result
Happy Halloween everyone!
A quick google search brought up the kind of sound bytes I needed, this was a really easy site to pick up royalty free stuff - http://soundbible.com/
Next I needed a sound editor, I wanted something simple but with multiple channels - a quick search brought up http://www.aviary.com/ it was 'relatively' easy to use, I could import the sound bites I had downloaded from Soundbible and then record my own voice direct from my headset.
As you have multiple channels in the Aviary suite, you can adjust the different volumes and add extra effects.
I was very pleased with the result
Happy Halloween everyone!
Thursday, October 13, 2011
Video Conferencing - getting the right ambience
The powers that be have just enabled MS Office Communicator for Video Conferencing at our site, which means that anyone with a webcam can join in Video Conferences from their laptops in their office, this is of course, great news, it means less travelling, less cost and better communications.
Having a Video Conference from my office did get me thinking though, now that I have participated in a few 'VCs', some of the offices are, well a bit crabby, there are papers everywhere, old computers dotted about the place etc. so I have decided to improved the quality of how people see me when on a VC.
The 1st job was to find an appropriate photo on ebay, I picked up a large beach poster for £6. The poster is stuck behind my desk on the wall.
 Getting the poster in the right place was a tad tricky, it needed two people, then I had to play around with the zoom function on the web cam, but eventually I managed to get the kind of result I wanted.
 Now all I have to do is improve the ugly mug in the picture, and I will have the desired effect I was after - perhaps a George Clooney look would be better...
Having a Video Conference from my office did get me thinking though, now that I have participated in a few 'VCs', some of the offices are, well a bit crabby, there are papers everywhere, old computers dotted about the place etc. so I have decided to improved the quality of how people see me when on a VC.
The 1st job was to find an appropriate photo on ebay, I picked up a large beach poster for £6. The poster is stuck behind my desk on the wall.


Subscribe to:
Posts (Atom)